Sourdough-Blueberry-Muffins

Hey there :)

So lately I am missing a bit of time. And I really wonder how other people manage having different things in their lives so much more effective than I do and thus can do all the things they want. But for me it seems I always have to choose between one or the other. Partly I think my laziness is at fault for I just chill on the sofa doing nothing for too long of a time. I am too lazy for life ^^°

So, while I still cook and bake I kind of don’t take photos of pictures anymore. And when I feel like taking pictures it’s either dark already or the sun decides to bid me farewell. so this kind of makes things harder for the blog. But I guess I have live with that. As long as I can still eat enough stuff I guess I will be fine :)

sauerteigheidelbeermuffin2

sauerteigheidelbeermuffin3

So, one of the things I baked and actually photographed are these muffins. Made with a bit of sourdough and whole grain flour and buckwheat they are not the lightest and fluffiest muffin you will ever have. But they fill you up nicely and have and have nicely not-overpowering sweetness to them. For me they even work as a breakfast, especially on weekends. A nice balance between an sweet treat and nutritious package :)

sauerteigheidelbeermuffin5


Recipe Sourdough Blueberry Muffins

Ingredients

Wet

  • 100g sourdough* (100% hydration)
  • 110g greek yoghurt
  • 70g apple sauce
  • 55g maple syrup
  • 2 eggs
  • 100g butter, melted and cooled


Dry

  • 100g whole grain spelt flour
  • 85g buckwheat groats, ground (or buckwheat flour)
  • 30g sesame seeds, ground
  • 50g coconut sugar (or brown sugar)
  • 2 tsp. vanilla powder
  • 1 tsp. baking powder
  • ½ tsp. baking soda
  • pinch of salt


Fold Ins:

  • 200g blueberries (I have used fresh)


Instructions:

*For the sourdough you can either use some discard starter or make it by combining 20g of sourdough starter with 40g of flour (any will do, I used whole grain spelt) and 40g of water. Let sit for 6 hours or more (I let it sit overnight).

Preheat your oven to 180°C.

In a big bowl combine all the wet ingredients and stir well until everything is fully mixed.

In another bowl mix together the dry ingredients.

Add the dry ingredients to the wet ingredients and stir until well combined.

Carefully fold in the blueberries. Spoon about 2 Tablespoons of dough per muffin into muffin tins (I have used silicone ones and that worked pretty well) and bake for about 25-30 minutes or until an toothpick comes out clean


sauerteigheidelbeermuffin1

Sourdough Hokkaido Milk Bread with 2 different fillings

Hey there :)

Do you know the tangzhong (or water-roux) method? It’s mainly used is asian parts of the world to create a fluffy, pillow-y bread. Often called Hokkaido Milk Bread. And it’s awesome! And super easy actually. You just mix together some flour and water and heat it for short period of time. Now, I don’t get the whole chemical process behind this entirely, but making this gel and using it in baked bread will help to keep the moisture in the dough, as the tangzhong part sort of locks the liquid in the dough. Also, it won’t develop as many gluten as normal dough does. Hence the result of baked treats using tangzhong are soft and moist in the most pleasantly way.

For this bread I have combined the tangzhong method with a sourdough base and it works quite well. The sourdough adds a slight and subtle acidy, that deepens the flavor of the bread. Also you don’t need any yeast in order to make the bread rise (if your sourdough is strong) which is something I personally prefer.

sauerteigtangzhong5

For the recipe here I am giving a very basic dough that works with either – sweet or savory fillings. So if you feel like it, you could just divide the dough in half and make one sweet and one savory smaller bread out of it. Which is great, if for example you’re having a gathering and want to provide with sweet and salty treats :)

sauerteigtangzhong3

sauerteigtangzhong13

sauerteigtangzhong12

But you could also easily adapt the dough, add some more sugar or vanilla, cinnamon, tonka bean etc. to it to make the dough itself sweeter. Or some more salt, pepper and herbs for example for a heartier version. You can really adjust the basic recipe in so many ways, it’s great.

Same goes for the filling. I have made this bread with different fillings by now. The classic cinnamon-sugar version is always awesome, but add a grated apple, or two and it will get even better. Or use some Nutella. or peanut butter and banana. The sky is the limit ;)

So, the making of the dough takes a bit of time and maybe time management, but the steps themselves are pretty easy and totally doable even for a not so experienced baker I’d say :)

sauerteigtangzhong15


Recipe Hokkaido Milk Bread

prep time: about 25 minutes + proofing time + baking time +++ yields: one large bread or two smaller ones


Ingredients

Hokkaido Milk Sourdough Bread

For the sourdough

  • 50g sourdough starter
  • 75g whole wheat flour
  • 75g water


for the tangzhong

  • 2 Tbsp. white wheat flour
  • 6 Tbsp. water


for the bread

  • all of the sourdough (200g)
  • all of the tangzhong (75g)
  • 100g milk
  • 350g flour (I have used half whole wheat and half white wheat flour)
  • 1 egg
  • 40g butter, very soft
  • 1 Tbsp. brown sugar
  • 1 tsp. salt


notes on the dough: Like this you have a dough that works with sweet and savory options as it is very neutral. If you want to make a dough that tends to be a bit sweeter (don’t make it too sweet when you add a sweet filling or it might be too much), add another 3 Tbsp. of brown sugar and maybe 1 tsp. of vanilla paste or cinnamon.

For a more salty taste, add another teaspoon of salt and maybe some cracked black pepper or even a tablespoon of pesto or garlic butter. But those are just modifications, they are not necessary as the filling will also lend a lot of flavor :)


Fillings

Sweet Version, Cinnamon-Sugar

  • 115g butter, very soft
  • 2 Tbsp. cinnamon
  • 1 tsp. cardamom
  • 1 tsp. vanilla paste
  • 1-2 apples, grated (optional)


Savory Version, Pesto-Cheese

  • 5 – 6Tbsp. pesto
  • 3 cloves garlic, pressed
  • ¼ Cup parmesan
  • 1 ½ Cup grated cheese (like mozzarella or gouda or cheddar, or a mix) to sprinkle on top of the pesto


Instructions Filling

Combine all the ingredients for the filling in a small bowl (except the cheese in the savory filling) and stir until well combined. Taste and adjust spices to your likings.


Instructions Hokkaido Mild Sourdough Bread

Make the sourdough

Mix together the sourdough starter, water and flour and let sit for about 10-16 hours (or overnight).

Make the tangzhong

In a saucepan mix together the flour and the water. Heat the mixture over medium heat, constantly stirring. The mixture should thicken up to fairly fast to a gel-like consistency. Once you can see the bottom of the pan because of lines the dough make when stirring, turn off the heat. If you have a thermometer check the temperature of the dough. The dough should reach 65°C. On the hot stove keep stirring for about 30 seconds and them remove from heat. Place in a clean bowl, set aside and let cool completely.

Make the bread itself ;)

In a big bowl mix the sourdough with the milk, stirring with a wooden spoon. Then add the tangzhong and egg and mix it into the mixture as well until evenly distributed.

Then add the salt, sugar and flour and mix with a wooden spoon until the dough roughly comes together.

Then switch to using your hands ;) Knead the dough for about 4-5 minutes until everything comes together. The dough will be quite sticky, but try not to add flour or the bread will get to dry. I always wet my hands several times during the kneading process so the dough will stick to itself and not to my hands.

Then add the butter in pieces to the dough and knead again for about 4 minutes. At the beginning it will be a bit messy, but it’ll get better over time. Again, the dough is sticky, but try refraining from adding to much flour. Just wet your hands, it really helps. After a while it should form a smooth and pliable dough, still a bit sticky though.

Cover the bowl and refrigerate overnight. You could also use the dough the same day and just leave to rise for about 2-3 hours at room temperature, but leaving it to rise overnight will result in a better flavor and also the gluten has more time to develop, so I highly recommend this version.

After the dough has risen, roll it out into a rectangular shape on a floured working space. Now you are allowed to add some flour on top the dough to make the rolling out easier ;)

Spread and sprinkle the desired filling on top. Then cut the dough into strips and then cut into rectangles that easily fit in your loaf pan. Staple the pieces onto each other and place into a well-greased (or baking sheet lined for the safest option) rectangular loaf or cake pan. Make sure to leave some space at the sides as the dough will rise a bit again.

Leave to rise for about 60 minutes. When readily proofed you can brush it with some more melted butter if you want, but that’s optional

Bake in preheated oven at 175°C for about 35-40 minutes. If you want to sprinkle something on top (like sugar or cheese, do that after 20-25 minutes of baking)

sauerteigtangzhong1

sauerteigtangzhong7

Sourdough: How to make your own Starter + Easy and fast Whole Grain Bread Recipe

Hey there :)

In a lot of baked recipes I use sourdough so in case you don’t quite know what it is and what it does here is some info on my good pal. This post will be just short summary plus a how to make a starter yourself. It certainly is not the Holy Grail. There is a lot more to know and there are many ways to create a starter. This is the “technique” I have used when I made my own. I think it is the most simple and pure way to make a starter and I am happy with the result. But just so you know, there are different ways asking for different ingredients :)


What is Sourdough?

Sourdough is a mixture made mainly of water and flour that captures some microflora that is naturally present almost around everything :)

Meaning sourdough uses wild yeast and lactobacilli to make the dough rise. The lactobacilli makes the readily baked bread taste a bit sour – hence the name sourdough – but it will also help keeping the bread fresh longer thanks to the lactic acid it produces.

sauerteig3

Working with sourdough will usually require a longer fermentation time compared with doughs that use baker’s yeast. Combined with the occurring acid this also helps breaking down the gluten in the flours, making it more digestible. Some people that don’t tolerate gluten in normal breads can actually eat bread made with rye and sourdough. But that doesn’t work for everyone unfortunately.

What all this means is you have to be more patient, but you will also be rewarded with a more gut-friendly loaf.

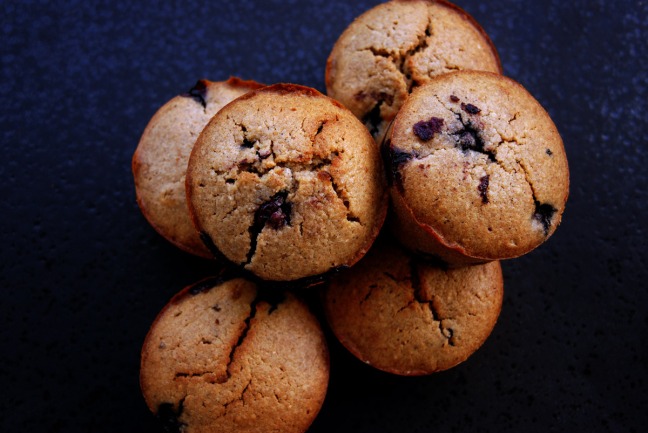
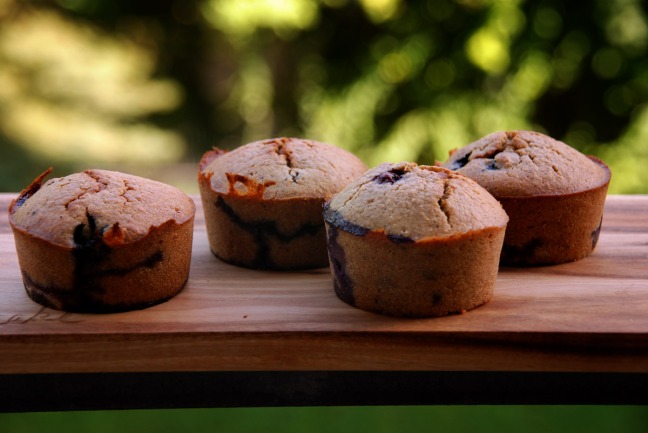
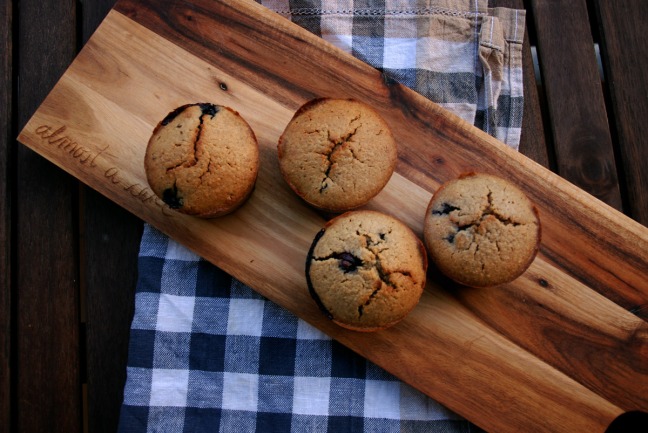
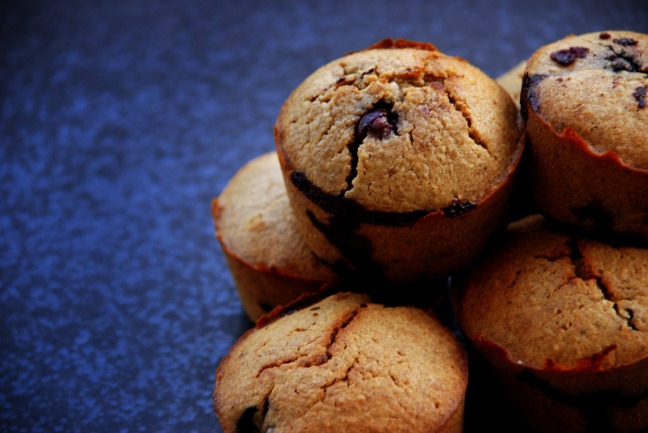
Also, sourdough isn’t exclusive to making bread. You can also use it for pizza or make some sweet treats like cakes or cookies or pancakes and waffles. Sky is the Limit ;)

sauerteig5


A sourdough starter.

Here we go. The starter. A sourdough starter, sometimes also called leaven, is basically made from flour and water. It will use wild bacteria that it gets from its surroundings to leaven the bread.

How to make a starter?

As said, you will need two ingredients: water and flour. That’s it. Some people make starter by adding some yoghurt, sugar, raisins, yeast or other stuff to it. But for the starter I made I have used only flour and water. I am perfectly happy with my starter as is, so I don’t see a reason for myself to add other things even though it might speeden up the process.


Tools you need

a scale. Seriously, if making bread a scale isn’t really just a mybe-option. You need to be more precise than with “normal” baking. A scale will help you with that big time. No cups and stuff :)

a wooden spoon. Just for stirring. Wooden is best, but any spoon will work if you don’t have a wooden spoon (which I would find hard to believe)

a big bowl. Jep. big. Don’t underestimate the growth of your starter. The ingredients might make you think a small bowl or glass will do. But no, it won’t, believe me. When I made my first starter I used just a big mason jar and I thought it was enough. I wasn’t. That stuff is farting ;)


“Recipe ” Sourdough Starter

Ingredients

  • 350g whole grain rye flour (100g+100g+ 150g) Can you use another type of flour? Yes you can. But whole grain is optimal. The ore refined the flour, the less active bacteria  it contains that is needed for an active starter. Rye flour also works better than wheat, but it will work with either type. Maybe it will need a bit more time.
  • 350g water (100g+100g+ 150g) Can you use Cola, coffee or vodka? No. Don’t. Water is the thing.


Instructions

Day 1

In a bowl mix together 100g of flour and 100g of warm (not hot) water. Stir until well combined. Cover with a damp towel and set aside for 24 hours at room temperature.


Day 2

Take the bowl from Day 1. Stir the mixture. Then add 100g of warm water, and stir until combined. Then add 100g of flour and stir until combined. If the mixture is too dry so it cannot be mixed thoroughly, add another 10g of water. Cover with a damp towel and set aside for 24 hours at room temperature.


Day 3

Take the bowl from Day 1. The mixture should be a bit bubbly and smell a bit sour. This is how it should be. To the mixture add 150g of warm water and stir until combined. Then add 150g of flour and stir until well combined. If the mixture is too dry so it cannot be mixed thoroughly, add another 10g of water. Cover with a damp towel and set aside for 24 hours at room temperature.


Day 4

Take the bowl from Day 1. The dough should have risen noticeably and have some bubbles and a sour smell. If it does, congratulations :) You hereby are in possession of your own sourdough starter. Dance in joy, sing out loud, bake your bread :)

In case your dough isn’t bubbly and airy, add another 50g of water and 50g of flour and set aside for another 24 hours.


Notes on the starter              

Can you use less flour? Yes you can. Just make sure you reduce the water by the same amount. For example 50g flour+50g water on day 1, 50g flour+50g water on day 2 and 50g flour+50g water on day 3 might work just as well. Just check if the starter is bubbly enough on day3. If not, add another portion and wait another day.

This starter is a baby. It still might be a bit weak and might need a bit help to access its full potential. So it might be useful, when baking your first three breads, to add just a bit of baker’s yeast, just until your baby is strong enough to walk on its own. With every feeding it will get stronger and eventually it can lift your bread all on its own. Or if you don’t mind a mild rise go ahead and bake without yeast :)

This rye starter can easily be turned into a wheat or spelt (or even oat) starter. Just use about one tablespoon (25g) of the starter and feed it with equal amounts (by weight) of the needed flour and water. You won’t get a 100% pure starter by that, but that isn’t a problem at all. Only if you want a 100% wheat or spelt starter, you will have to go all the way to make a new starter with just that sort of flour.

By the way, if you know someone with a starter ask if you can get a bit of it. You can add it to your own starter to give it a boost. I actually got some starter from a colleague. Although my starter was already made at that time and was strong enough for a bread without yeast, I still added it for extra strength :)


How to store a starter?

I always keep about 150g of the starter in a glass jar in the fridge. My jar is not airtight and that works well. But I know some people prefer airtight. Your choice. I bake bread almost every week and hence feed it every week. But feeding it every two weeks should be sufficient in my opinion. But as always, there are loads of different opinions on the net, just make your own experiences :)

You can also freeze your starter if you don’t bake that often or add a lot flour to dry it. Like this it will last longer without a feeding.


Ok, so now you have a lot of starter. Here is a very easy basic bread recipe, ideal for beginners without much fuss and also, for a bread, it is done really quickly. It’s a recipe for a bread made with just whole flours (mainly rye) and not really much more. It is nothing fancy, nothing to brag with. Just plain and basic read. It’s my default recipe when I am busy or don’t feel like checking on my loaf every 30 minutes for a turn and fold. If you have never baked bread, this is an easy start :)


Recipe Whole grain simple sourdough bread

prep time: about 10 minutes + 2 hours waiting time + 1 hour baking times +++ yields: one big loaf of bread

Ingredients

  • 550g sourdough (made from rye)
  • 240g whole rye flour
  • 120g whole wheat flour
  • 260g water
  • 12g salt
  • 5g molasses or honey (optional)
  • optional: 10g yeast if your sourdough still lacks some power
  • optional: fold ins like sunflower seeds, sesame seeds, flax seeds, chopped nuts…


Instructions

Mix together all the ingredients, starting my adding the water to the sourdough, then adding the salt, molasses and flours (and fold ins if desired). Mix with a handheld blender on medium low for about 5 minutes. Let rest 30 minutes in the bowl.

Then transfer the dough into a big loaf pan, not filling it more than 2/3 to the top. You will need a dough scraper for that. At least this will make it a lot easier. Brush the dough with a bit of water and leave to rise for about 60-90 minutes. The dough should expand noticeably.

At least 20 minutes before you will bake the bread preheat oven to 250°C.

simplebread3

Place the bread in the oven and pour a cup of water into the oven (or on a hot baking tray positioned on the lower part of the oven). Bake for 10 minutes at 250°C, then lower the temperature to 200°C, keep baking for 5 minutes and lower again to 175°C. Bake for another 45 minutes. If the top gets to dark, cover with aluminum foil. Take the bread out of the oven and out of the loaf pan (being careful as it is hot. You might need to wait for 5 minutes.) Place in the oven without the loaf pan for another 5-10 minutes. Take out of the oven and let cool completely.


simplebread4

Sourdough Emmer Bread

Hey there :)


So far this year I have been playing around with different grains when baking bread. Not that I was running out of normal flour… No, that will never happen.. I kid you not when I say we have 10 different bags of flour in our cupboard.. I have a flour obsession…

I just wanted to test how grains like millet, amaranth, buckwheat etc. work in a bread. And they work quite well and sometimes they also lend a totally different flavor. Amaranth for example really hast some interesting strong flavor :)

This bread however tastes like some pretty classic bread, maybe a bit nuttier and earthier. But it is a taste you will be used to. It is however made with emmer, an ancient grain that nowadays isn’t as common anymore. It is related to wheat and also contains gluten, so it is not a substitute if you are intolerant. It has however more nutritional value than your standard wheat. And it is wayyy more expensive… if you can find it, that is. To be honest I couldn’t find in any local store so far, so the internet might be a better place to look for it ;)

But even with its price and hard-to-come-by-ness, it is worth to give it a go, as it is really healthy. Plus I love experimenting with new stuff. So if you can get your hands on emmer (or emmer flour), go get it ;)

emmerbrot4

For this recipe I have used whole emmer berries and ground them myself and that worked perfectly fine. But I guess using some (whole grain) emmer flour will be ok, too. For the base I went with rye-sourdough and I also added some spelt flour to the dough. So it’s not a 100% emmer bread, but still has enough so you can call it the main ingredient here :) The recipe will take some time to make, but most of it will be passive waiting time and won’t require an active you working the dough. So if you plan your schedule, this bread is quite manageable :)

emmerbrot1

emmerbrot6


Ingredients

Soudough:

  • 50g sourdough starter
  • 75g whole grain rye flour
  • 75g water

Emmer –“pudding”:

  • 50g emmer flour or emmer berries
  • 250g. water


Main Dough:

  • all of the sourdough
  • all of the emmer-pudding
  • 200g emmer flour or emmer berries
  • 150g whole grain spelt flour
  • 50g water
  • 10g butter or coconut oil
  • 10g molasses
  • 10g salt


Instructions

Day 1

Mix your sourdough starter with rye flour and water an set aside for at least 10 hours until it gets bubbly and active.

Day 2

Mill 250g of your emmer berries. If you already have emmer flour you can skip that step.

Measure 50g of emmer flour and combine in a small pan with 250g of water. Over medium-low heat bring the mixture to a simmer, stirring constantly, for about 2 minutes until you have a pudding like consistency. Take away from the heat and let cool. This step can also be done at Day 1

Mix all the ingredients except for the salt together in a big bowl and knead for about 10 minutes until thoroughly combined. Set aside for autolyze for about 30 minutes.

After 30 minutes add the salt to the dough and knead again until evenly distributed.

Set the dough aside for 4 hours, stretching and folding the dough every 30 minutes.

On a floured workplace take out the dough and divide it into 5 equal parts. Form the dough into round and place them one after another into a long and greased baking tin OR use a small one and bake half of the dough as pan rolls. Up to you. Sprinkle some flour on top and place covered in the fridge (or somewhere outside if it is cold enough) for about 10 hours for a long fermenatation.


Day 3

Preheat your oven to 250°C. Take the dough out of the fridge and let sit at room temperature for about 30 minutes. With a knife or dough scraper press little Xes on each part of the dough. Place the bread in the middle part of your oven and pour 1 Cup of water into the oven or a hot baking tray on the lower rack of the oven. Bake for 10 minutes then reduce the heat to 200°C and bake for another 35-45 minutes. After about 30 minutes take the bread out of the tin.

Rye and Beer Bread with Sourdough

So I had wine, now it’s time for beer ;)

I barely drink beer. But for some reason I sort of like working with beer when I am baking. I have made quite a few breads that contained different sorts of beer and bread types. Malt beer, dark beer, light one; sourdough, yeasted, savory, sweet etc. It is sort of fun using an ingredient that at first might look a little odd. But I pares really well with bread and it also helps with the rising :)

Also it always sound funny if you get asked what you ate for lunch. Beer. Heh. ;)

bierbrot27

I made one with some bread malt beer the other day and it had a really distinctive and funny crust, since the sugar in the malt beer caramelized. Working with beer really gives you some fun projects and I am always a bit worried about the outcome. But actually most of the times it turns out good – or at the very least edible ;)

So here is a random beer-bread recipe for you out of a variety I have used. Feel free to use any beer you have on hand. Darker bread will yield a bit more rustic flavor and lighter beer will also result in a lighter taste.


Recipe

Ingredients

  • 400g whole grain rye sourdough
  • 1 can of beer (330ml)
  • 175g whole grain wheat flour
  • 350g whole grain rye flour
  • 1 Tbsp. Molasses or Honey
  • 15g salt


Instructions

The evening before prepare the sourdough: Mix 50g of sourdough starter with 170g of whole grain rye flour and 180g of water. Cover with a damp towel and set aside for at least 10 hours.

In the morning (or whenever you make the bread) add the beer to the sourdough starter. Mix until distributed. Then add the flours and the molasses (or honey) and knead thoroughly by hand for about 3-4 minutes. This dough contains a lot of rye so it will be a bit hard to work with. It helps wetting your hands while kneading or you can use kneading machine instead of your hands if you so wish.

Set the dough aside for about 30-50 minutes for autolyse.

bierbrot1

After that time transfer the dough to slightly floured working surface and knead the dough (I have used another 40g of white flour during this kneading process). Bit by bit incorporate the salt while kneading. If you have by accident added the salt beforehand, don’t worry. It’s okay as well. Salt will just tighten the gluten a bit, but it’s not really a big deal. In total knead the dough for about 8 minutes here.

Then shape the bread and place into a rising basket. Set aside to rise for about 2-3hours.

bierbrot2

Preheat the oven to 250°C. When the bread is done rising transfer it to a hot baking tray or baking stone and cut the outside with a sharp knife of razor blade. Pour a cup of water in the oven and place the bread in the oven, on a middle-lower rack.

Bake at 250°C for about 15 minutes then reduce the heat to 200°C and bake for another 45 minutes. After 30 minutes check the darkness of the bread and cover with aluminum foil if necessary.

Take out and let cool.

bierbrot8

Carrot-Pumpkinseed-Sourdoughbread

Hey there :)

Filling some veggies into my bread is something I like to do once in a while. For one, I like to imagine it’s healthy. And also it helps keeping the bread moist for a little longer. So I still had some carrots in the fridge, which in Germany actually is a more or less common addition to bread. Not that every bread has some in them, but it’s nothing super unusual here. Don’t know about elsewhere. And of course, since it is autumn I added some pumpkin seeds and some pumpkin seed oil. I haven’t used it in baking before and in general I barely use oil when baking bread, but it turned out quite well. You have to keep your hands wet while kneading though. Or at least I did. I think the oil made the dough a bit stickier. Instead of normal salt I also used some herbal salt since we still have a lot and the flavours pair well with bread, but you can also use some normal salt if you prefer.

karottenbrot2

I did however use a smaller amount of sourdough starter in this bread. Usually I use twice as much. If you don’t have a string sourdough starter, you might want use one tsp. of yeast mixed with your water to make safe your bread proofs well. With a nice and string sourdough starter however it shouldn’t be a problem :)

Oh, and I don’t habe pictures from the kneding and proofing process unfortunately. Battery of the camera was empty. oops.

Recipe

prep time: about 30 minutes + waiting and baking time +++  yields: one loaf

Ingredients

  • 200g whole grain rye sourdough
  • 500g dark wheat flour (I used Type 1050) or whole wheat flour
  • 200g water
  • 2 carrots, grated
  • 3 Tbsp. Pumpkin seed oil
  • 15g herbal salt
  • 5 Tbsp. pumpkin seeds

Instructions

The day before making the bread prepare the sourdough: Mix 50g of starter with 80g of water and 70g of whole grain rye flour. Let sit for 12-18 hours before using.

Roast the pumpkin seeds in a pan and set aside. Grate the carrots, put in a sieve and let drain a bit.

In a big bowl combine the sourdough starter, water, pumpkin seed oil, carrots and flour. Knead for about 5-8 minutes, until you have an elastic dough. Set aside to proof about 3-4 hours, until doubled in volume

Take the dough out on a floured workplace. Knead the dough again, incorporating the salt and the pumpkin seeds as you go. Knead for about another 5-8 minutes.

The form into a loaf and place seam side down into a well-floured rising basket. Leave to proof again for about 45- 60 minutes.

Preheat the oven to 250°C and place a baking tray (or baking stone if you have) in the oven.

Put the bread on the hot baking tray (by turning the rising basket upside down). Cut the bread several times.

Put the bread in the oven and pour one Cup of water into the oven.

Bake at 250°C for 10-15 minutes. Then reduce the heat to 180°C and bake another 20-25 minutes.

The bread is done when it sounds hollow when tapped on the backside with a spoon.

karottenbrot1

Grainy Spelt Sourdough Bread

I’m a bread-lover. And I don’t know why, but I sometimes feel like bread has lost a bit of its popularity the last few years. With all that celiac disease stuff and so on. But even some people that are normally fine with gluten seem to avoid it nowadays. And sometimes I feel so sorry for the bread. L I mean there is nothing better than freshly baked bread, still warm on your hands and the butter starts melting on it when you start smearing. Poor bread, give its awesomeness some credit. Why would anyone who doesn’t have celiac disease miss this? I don’t get it… Of course there are still a lot of bread lovers out there – Wehoo to y’all! – but still sometimes I want to hit those (in my ignorant eyes) ignorant bread-loathers with some nice fresh baked bread in the face. And then again :) Just some off topic stuff… Love the bread again people :P

koernerbrot8

Anyway, to celebrate my own love for bread I usually make one loaf every week. Working with the flour might be some kind of calming meditation for me. I am not sure. And to be honest I do have a standard recipe that I turn when I don’t feel like testing around too much (nothing sadder than some brick coming out of the oven…), but sometimes I try using new ingredients. And I am being a little late on this one, but I was introduced to Kefir just recently. Not that I wouldn’t know of its existence. I just didn’t use it. Maybe I am more the buttermilk-type? Well, I have baked a bread with Kefir and it actually turned out quite good (this one, for those interested), so I wanted to try another bread with it. Without a given recipe, just fooling around a bit :) And I have to say, I like the result. I have to admit as the dough is super sticky and wet, you cannot work it with your hands (at least I couldn’t, but maybe you are more skillful than I am). Which is always a little less cooler than diving your hands all the way into the dough, I might just make this one more often. A big plus of it is, that it really stays good and moist for long. Even a week without getting too dry :)

koernerbrot7koernerbrot10

So, I just hope that everyone everywhere will find their love for bread again and shall be healed form celiac disease. Seriously. What is that shit. No one needs it!

Recipe

prep time: about 20 minutes + proofing time + baking time +++ yields: one loaf

Ingredients

  • 200g whole grain rye sourdough
  • 315g kefir
  • 30g pumpkin seeds, shelled
  • 60g sunflower seeds
  • 30g flax seeds
  • 30g rolled oats
  • 250g dark spelt flour (I used type 1030)
  • 115g whole grain wheat flour
  • 12g salt
  • more seeds to sprinkle

Instructions

The night before prepare your sourdough: In a bowl mix together 50g of sourdough starter, 75g of water and 75g of whole grain rye flour. Cover with a towel and set aside (for about 10-18 hours). You can also use sourdough starter from the fridge if you have enough.

The next day add the kefir to the sourdough (It should be now all bubbly and expanded in the bowl significantly) Stir until combined. Then add all the seeds and the salt and stir again.

Now gradually add the flours. Work with a kneading machine on low-medium to distribute everything evenly. This is a very wet and sticky dough, so it is hard to work it by hand. If you have the patience you can still do it. Water your hands frequently for it. But to be honest it is way easier using a kneading machine. Once everything is well combined continue to knead the flour with the kneading machine for another 5 minutes. Then set aside for about 30 minutes. The dough will only rise a tiny bit at this point.

After 30 minutes transfer the dough to a baking pan. Mine was about 30cmx8cm / 11”x3”.

Again set the dough aside to rise for about 90-120 minutes. In this time the dough should expand a bit.

koernerbrot1koernerbrot2

koernerbrot4

Preheat the oven to 250°C. Place one baking tray on the lower rack of the oven and one in the lower-middle rack. Just before putting the bread in the oven sprinkle some seeds on top. Cover the top with aluminum foil. Place the bread on the upper rack and spill a cup of water on the lower baking tray. Be careful there will be hot steam!!

Bake the bread for 15 minutes, then reduce the heat to 190°C and bake for another 40 minutes. After about 20 minutes of baking take away the aluminum foil. If you feel the top gets too dark during the baking process you can cover the bread again.

koernerbrot5korrnerbrot6

Take the bread out of the oven. Let cool for about 5-10 minutes, then carefully remove the bread from the baking pan and bake the bread 150°C without the pan for another 5 minutes.

Take out and let cool.

koernerbrot7

Corn-Zucchini-Sourdough-Bread

Hey there :)

Zucchini bread is a bread I wanted to make for a while now. And with all the zucchini being so cheap at the moment (even the organic ones) it was about time to give it a try. As this being the first bread I have made with zucchini (and corn) it was quite a bit of an experiment. If it comes to taste I really like the bread. I has a nice crumb and soft inside – and thanks to the zucchini it keeps like that for several days. But unfortunately, after transferring the dough from my rising basket to the baking tray, it shrunk a bit and lost some of its volume. I am not quite sure why, I am guessing next time I would reduce the water content a bit (maybe to 85g). Or I would try to let the dough rise just on the baking tray and not in the rising basket. If anyone of you has some advice or idea, I’d love to hear it :)

But anyway, as I said, I still liked the texture and taste of this bread a lot. It is a very light bread with a nice color thanks to the corn flour. And it works with savory or sweet combination. Or even plain :)

zucchinibrot2

Recipe

prep time: 45 minutes + proofing and waiting time +++ yields: one big loaf

Ingredients

  • 350g wheat sourdough
  • 200g white wheat flour
  • 100g corn flour
  • 200g zucchini, grated
  • 100g water
  • 13g salt
  • 2 Tbsp. sunflower seeds (optional)

Instructions

The night before start making the sourdough: Mix together 50g of sourdough starter with 150g of (whole) wheat flour and 150g of water. Cover and set aside over night. Or you could use unfed starter from the fridge if you have enough.

The next morning start by grating the zucchini. In a sieve mix with a teaspoon of salt. Set aside for about 15 minutes and let some of the water drain.

Meanwhile in a big bowl mix together the sourdough, water, wheat flour and corn flour (I have used the fine flour, but I guess you could use corn meal – the one you use for polenta – as well).

Drain the zucchini properly, either with your hands or even better with a cheesecloth and mix into the dough together with the sunflower seeds. Set aside for 20-30 minutes.

zucchinibrot1

Prepare your rising basket: Line it with a cloth and flour it well, also on the sides.

After 20-30 minutes transfer the dough to your floured workspace. Knead the dough for about 8-10 minutes, gradually adding the salt to the dough. If needed to work with the dough add some more flour, one tablespoon at a time.

Now shape the dough into a loaf. I usually do this by stretching the dough a bit into an oval form and the roll from one side to the other. Smoothen out the edges a bit. Place the loaf into your rising basket and dust with a bit of flour.

zucchinibrot3

Let the dough rise for about 2-3 hours at room temperature (Mine needed 2 hours).

Preheat your oven to 230°C and place a baking tray, or if you have a baking stone, in the oven. When the oven has reached 230°C take out the baking tray and carefully place your loaf upside down on it. If you want to you can cut the loaf about 3 times. Put it back in the oven and pour a cup of water on the bottom of your oven. Be careful, there will be hot steam! Close the door of the oven right after.

Bake the Bread for about 35-40 minutes.

Take out of the oven and let cool slightly.

Pull-Apart-Sun-Sourdough-Bread

Hey there :)

So, usually the things I bake are somewhat messy. Or plain and simple. And I am totally fine with that. I am not the decorating-type. I don’t need overly pretty or styled food, the rustic look works perfectly fine with me. Not that I don’t try making things look pretty once in a while, but mostly I fail. Or it ends up looking messy or somewhat accidental again. I don’t really mind. That’s just how it is. Neat is not my thing. It also is impossible for me to bake and when I am done the kitchen still looks somewhat tidy. Eh-eh. I am close to having to renovate our kitchen after ever bigger food-experiment (Easy stuff works out ok though by now ;))

So anyway, I did see this recipe from Natasa. And it looked so nice and pretty and just once I wanted to see, if I might be able to do it. So I gave it a go. And it actually worked out. M result isn’t as pretty as hers, but for me making something that looks that neat is really rare. And it wasn’t even hard. It is easy to make but looks sort of impressing. Well – it does to me. (I just wish the pictures would have turned out to be a bit better.. Well, can’t be changed now…) Maybe you are used to even more art-like bakery? Anyway, I was happy I finally also could do something pretty. Boy, did I feel like one smart cookie. The saver of the baking world. The one true king of Westeros. Yeah. Whatever. :)

But I am a sweet tooth, so I also did change the recipe just a bit to turn it into a desert-ier version. And this recipe basically is the result. It has a classical cinnamon-sugar taste which I always appreciate. Like this it already is nice, but I personally liked the version with some apple on it even more. It adds a little juiciness and freshness.

So, seriously. Do this. Or Natasas original version. You will feel like a true hero :)

sonnenbrot5

Oh, this recipe will sometimes give you two options. A vegan and a non-vegan one. You can choose your favorite.

Recipe

prep time: about 45 minutes + waiting and baking time +++ yields: one large sun

Ingredients

  • 80g active whole grain wheat sourdough starter
  • 300g white flour or whole wheat flour
  • 175g almond-milk or normal milk
  • 4 Tbsp. pistachio oil (or oil of choice, but I would go for something nutty)
  • 2 Tbsp. of maple syrup or honey
  • 1 pinch salt
  • 2 Tbsp. coconut oil or melted butter
  • 3 Tbsp. brown sugar
  • 1 tsp. vanilla powder
  • 1 tsp. cinnamon or to taste
  • 1 apple, grated (optional)
  • handuful sesame seeds for topping
  • 1 egg yolk for garnish (optional, you could also use water)

Instructions

For the sourdough start the evening before making the bread. Mix 35g of water with 35g whole wheat flour and one tablespoon of active starter (rye or wheat both work). Cover and set aside for fermentation and prooving.

The next morning, add the almond milk and pistachio oil and the maple syrup or honey to the starter and stir. Then add the flour (in this case I have used normal white flour, but you can also use whole wheat flour) and the salt mix with a wooden spoon until all ingredients come together. Then start kneading the dough with your hands (or kneading machine, if you prefer) for about 10 minutes. It helps working with wet hands.

Form into a ball and place in a clean bowl. Cover with a damp, clean kitchen towel and set aside to rise for about 4 hours.

Just before the dough is ready, prepare your filling: Combine the melted butter or coconut oil, sugar, cinnamon and vanilla powder and mix everything good. Wash and grate one apple.

sonnenbrot2

When the dough has grown bigger prepare your working place. Dust your working place with flour. Take out the fermented dough and divide into two equal parts. Set one part aside and roll the other one out into a round shape (about 23-24cm / 9 ½ inch).

Now take the cinnamon-sugar filling and evenly spread it onto the surface, leaving about 1 cm space from the edges.

sonnenbrot3

At this point you can sprinkle some grated apple on top. You don’t have to but I would definitely recommend it. Set aside on a baking sheet lined baking tray.

Take out the other part of the dough and roll it out into another round shape with the same size. Cover the first round with the second one and press down at the edges.

Place a glass in the middle of the dough. Then cut divide the dough into four equal parts around the glass. Then divide each quarter into two parts and again into three parts, so you end up with 6 sticks in each quarter. Take each stick and twist it about four times.

sonnebrot4

Remove the glass. Apply eggwash or just some water over the whole dough. In the middle where the glass was, sprinkle some sesame seeds (or preferred seeds) on top.

In a 200°C preheated oven, bake the dough for about 30-35 minutes. Let cool slightly before serving.

Spelt Sourdoughbread with a Touch of Lemon

Hey there :) As it is summer I put lemon in a lot of things lately. This time I also put it into my loaf of bread. I always have to be careful with lemon though, as my boyfriend is a bit sensitive to it. So I kept the amount of used lemon zest down a bit. Nonetheless this bread was a nice bread with just a slightly tangy taste. And it made me happy whenever I bit on a “lemon-mine” ;) I wasn’t too sure about this lemon-in-a-bread thing, but it was actually really nice and if it wasn’t for my boyfriend I think I would even up the amount of used lemon. Too bad I can’t, but if you want to, feel free to add some more lemon :) zitronenbrot2 Freshly out of the oven this bread was soooo good. And it even had hat rustic look that I adore in breads, so lucky its crust cracked so nicely. It is nice a daily bread if you don’t want to prepare dinner every night with the heat at the moment. Or it is a nice base for some light bruschetta. Yummi :)

Recipe

prep time: 50 minutes + waiting time +++ yields:one big loaf

Ingredients

  • 550g active rye sourdough starter (235g whole grain rye flour+ 265g water + 50g sourdough starter)
  • 160g water
  • 400g spelt flour (I used type 1050)
  • 3 Tbsp. sunflower seeds
  • 20g rolled Oats
  • ½ lemon, zest
  • 13g salt
  • a bit of yeast if your sourdough isn’t strong

Instructions The afternoon or evening before making the bread mix together 50g of sourdough starter with 235g of whole grain rye flour and 265 g of water in a big bowl. Set aside and let sit for at least 12 hours, 16-18 hours is even better. The next day add to the now active and bubbly sourdough 160g of water, 400g of spelt flour, the oats, sunflower seeds and ½ of a lemon zest. If you like lemon a lot, you can add more. Knead everything until evenly distributed and the dough is wet and a bit sticky. Set aside for about 30 minutes. I always use my hands, but you can use a kneading machine if you prefer. In those thirty minutes you can have a coffee and prepare your rising basket by dusting it properly with flour (I also like lining it with a towel, but this is optional). If you do not have rising basket don’t worry. You do not one necessarily, it just helps with forming the bread. Also put some flour on your working space. After 30 minutes place your dough on a slightly floured working space. Also put some flour on top of the dough. Knead with your hands for 8-10 minutes, gradually adding 13g of salt. You might need to add a bit more flour sometimes. Whenever your dough sticks to your table to much, add just a bit more flour (any flour would work here). I also use wet hands kneading the dough as is doesn’t stick too much to my fingers then. zitronenbrot3 I usually knead dough by folding the edge of the dough not facing me over the end of the dough facing me and then press it down with my handballs. Then I turn the dough by 90° and repeat. And repeat again. And again. After a while the dough will feel more elastic and not as sticky as it has in the beginning. When you are done kneading, form the dough into a loaf: Stretch the loaf and beginning at the near end, roll up the dough into a log-shape. Press down the seals a bit and straighten out the ends just a bit. Place into your rising basket, the side with the seals on the bottom (or just on baking sheet if you don’t have a rising basket). Sprinkle some flour on top. zitronenbrot4 Let the dough rise. I put mine in the fridge went to university. After I came home (after about 4 ½ hours), I took it out of the fridge and let it sit for another hour. But you can also just let it rise at room temperature, for about 3 hours. You can see if your dough is ready by poking it. If the indent made does not spring back quickly it is ready to be baked. zitronenbrot5 When ready to be baked preheat your oven to the maximum temperature and have the baking tray (or baking stone if you have) you are going to use in the oven so it can heat up (not with your bread on it ;)) When the oven is hot, take out the baking tray. Take out the loaf of the rising basket and transfer to the tray (The open end from the basket is now at the bottom). Using a sharp knife, slice the bread about three times. zitronenbrot6 Then put in the oven and pour about 1 Cup of water at the bottom of the oven as well (Be careful here, there will be hot steam!!) Reduce the oven temperature to 235°C and bake for about 35-40 minutes. Take out of the oven and let cool a bit, but have the first slice when the bread is still warm :) zitronenbrot1