Beetroot- Mango-Mint Salad

Hey there :)

So, how was your summer so far? Here in Germany it was so lala. We had some warm and sunny days, but overall it did not feel like a real summer. Except for all those mosquitos hanging around. Meh. But I still find it hard to accept that the days are getting shorter and I had only one day out at a lake. That doesn’t seem right to me… Anyway.. can’t be changed I guess…

rotebeetemangosalat5rotebeetemangosalat4

Well, apart from that I at least had some summer-y food. Light and easily whipped up stuff. Like this salad. It again has some beets in it, giving it a vibrant color. The earthy tone of the beets pair quite well with the tropical mango and on top of that it looks colorful ;) The avocado adds a bit of creaminess and Vitamin E which is good for your skin and the mint brings in some freshness. All in all I think it is a nice summer-y salad, due to the mango a bit on the sweet side of course. As a light snack it is optimal though. and tossed together in a hinch :)

rotebeetemangosalat1

rotebeetemangosalat2


Recipe Beetroot-Mango-Mint Salad

serves: 2 +++ prep time: 15 minutes

Ingredients

  • 2 medium red beets, roasted or cooked
  • ½ mango
  • ½ avocado
  • 10 leafs mint
  • 3-5 leafs romaine lettuce
  • ½ lime, juice
  • 1 Tbsp. olive oil
  • ½ tsp. cinnamon
  • salt and pepper to taste


Instructions

Cut the beets, mango and avocado into small cubes. Chop the lettuce. Wash and julienne the mint leafs. Mix everything together in a medium bowl, press the juice of half a lime and one tablespoon of lime, a bit of cinnamon and some salt and pepper and toss everything around and together until well mixed.

rotebeetemangosalat3

Red Beet Hummus

Hey there :)

So the other time I placed Barbie in a Mixer and pulsed. And this more or less the outcome.

roteBeeteHummus4

Except it wasn’t Barbie of course but red beets. While I am not the biggest fan of pink as a color in general in food I find it super fascinating. And not even raspberries and strawberries get the same screaming pink as red beet does. It doesn’t even look like natural food. Anyway I like playing with beets in food and add it to all different types of dishes at the moment ;)

And beets are really great for various reasons. It’s good for your heart and liver thanks to the phytonutrient Betain which is found in valid amounts in beets. Betain provides antioxidants, has an anti-inflammatory effect and is said to provide detoxification support. It’s also a mood elevator, so next time you’re heartbroken dig into some beets ;) (Well, I don’t think it would work that good but why not give it a try. If it doesn’t make you happy at least it is likely it will make you all messy ;))

roteBeeteHummus5

roteBeeteHummus6

Beets also have quite some folate which is good for the nervous system and helps tissues grow and cells work. Also helpful for your muscle regeneration when you do a lot of sports. Yeah.

Together with some chickpeas and tahini you will also get some protein from this hummus, which makes it a perfect after sport snack.

roteBeeteHummus3

And well, I guess I don’t have to tell you how to use hummus, but I will just share my favorite combination. Which was a savory corn muffin with this hummus, some avocado, beluga lentils, cucumber and romaine lettuce and just a tiny squeeze of lemon :)

roteBeeteHummus1 - Kopie


Recipe Red Beet Hummus

prep time: 25 minutes +++ yields: abou 2 ½ Cups


Ingredients

  • 1 can / 270g cooked chickpeas
  • 2 roasted or steamed red beets  (or if you like the taste, raw works also)
  • 3 Tbsp. tahini
  • ¼ Cup olive oil
  • ½ lemon, juice (and a bit grated zest if you like it tangy)
  • 2 gloves garlic
  • ½ tsp. cayenne pepper
  • 1 Tbsp. sugar
  • ½ tsp. cumin
  • generous amount of salt and pepper, to taste
  • splash of water as needed to thin out


Instructions

Quarter the beets and place all the ingredients except for the water in a blender and food processor (or use a handheld mixer for a little more work). Blend until smooth. If needed add a splash of water to get your mixer going and to achieve the texture you like.

Adjust spices to taste. Don’t go easy on the salt and pepper :) I also grated some lemon zest and adder it for a little freshness.

Matcha-Cashew-Smoothie

Hey there :)

A green smoothie without greens, yeah :) Yup. I don’t love kale in smoothies. It’s okay, like sometimes but it never feels like a treat to me. Just a practical way to veggie up your day if you somehow forgot to integrate them in your normal meals. But anyway I wanted to do a green smoothie.

So again here I come with something matcha-y and again because I am always careful with the dose it didn’t turn out as green as it could, admittedly. But I can’t help it, superdominant matcha flavor isn’t my thing so I go easy on it. But if you are into that stuff, go hard and matcha powder your smoothie up into a Kermit-the-frog-green color :)

matchacashewsmoothie1

matchacashewsmoothie2

This one is a nice small pick me up smoothie for the afternoon or great for an after sports-drink. It wakes you up thanks to the matcha and the banana and cashews in it will fill you up without stuffing you. If you use a frozen banana it also feels like you would sip on a milk shake which gives it a quite indulgent vibe ;) But of course this is also breakfast material. All in all pretty versatile in its use. Though I would want to eat it for dinner I think ;)


 Recipe Matcha-Cashew-Smoothie

prep time: 5 minutes +++ yields: one big or two small servings


Ingredients

  • 1/3 Cup cashews, preferably but not necessarily soaked
  • 1 big ripe banana
  • 90g / heaping 1/3 Cup yoghurt (natural or greek or soy or coconut for example)
  • 1 ½ tsp matcha powder, or up to 2 Tbsp. if you are totally into matcha
  • 1 tsp. honey or maple syrup
  • splash of water or milk of your choice


Instructions

It’s a smoothie. Place everything in a blender and blend until smooth.

matchacashewsmoothie3

Matcha Pancakes

Hey there :)

So my beloved monster is out for a business trip. This means for me that the evenings are a little bit boring and since cooking for just myself in the evening is something I barely do the food also is a bit plain. But I got compensation for that. And this is breakfast. You see, I love experimenting with my breakfast. But my monster is a bit different. More than everything else he basically just wants easy, fast breakfast. E.g. toast. Or on the weekends, breadrolls. But this is as crazy as it gets. So whenever I suggest something a little bit fancy or time-consuming that requires a bit of preparing, he usually is against this. Or when he isn’t it is still sort of limited to some ingredients. So him being away means breakfast-El Dorado for me as I can play around to my heart’s content. And I did :) I had sourdough-buckwheat crepes, blue-cheese omelette, baked carrot-oatmeal and these matcha pancakes.

matcha-pancakes1

matcha-pancakes3

I guess by now everyone has heard of matcha since it has a kind of moment. It is the only tea that uses the whole leaf. Matcha has quite some coffeein, it helps getting you up ;) It also has some vitamin A, B,C, E as well as the antioxidant catechin. Also some minerals like iron, calcium and potassium. You can drink it as tea or use it as an ingredient in baking and cooking as done here.

I was a bit surprised, maybe even disappointed that pancakes did not really turn out green. They have a greenish touch to them but you have to know it to see it ^^°. I guess this partly the fault of the whole grain flour and eggs and partly because I don’t like using too much matcha powder as I find it can turn out bitter. I prefer having just a hint of it. But if you are a matcha-lover you can go hard and use more in the pancakes.

matcha-pancakes2

matcha-pancakes7

For a bit more texture and another flavor dimension I also used some shredded coconut in the batter and 2 Tablespoons of ground sesame seeds for a bit protein. The coconut won’t be a dominant flavor, but it will be there, the sesame on the other hand barely came through. Also here, if you like sesame, double the amount :)

What you will get are some easy and sweet pancakes that pair perfectly with some apricot compote. I could also imagine some strawberries layered in-between. Or if you are all for sesame, some tahini mixed with a bit of honey or maple syrup. And of course, some fruits of your choice :)

matcha-pancakes4

matcha-pancakes5

Recipe Matcha Pancakes

Prep time: about 10 minutes +++  yields: about 12 small pancakes

Ingredients

  • 3 eggs
  • 85ml / 1/3 Cup milk of your choice
  • 80g / 1/3 Cup natural yoghurt (I used greek)
  • 140g / 1 Cup flour (I have used half grain and half all purpose wheat flour)
  • 20g / ¼ Cup shredded coconut
  • 2 Tbsp. sesame seeds, ground
  • 60g / 1/3 Cup sugar
  • 1 tsp. matcha powder (this will result in a light matcha flavor and not so green pancakes. If you prefer a stronger flavor you can up this amount to one tablespoon)
  • 1 tsp. baking powder
  • ½ tsp. baking soda
  • pinch of salt


Instructions

Mix together the eggs, milk and yoghurt and beat well.

In another bowl mix together all the other ingredients.

Then add the flour mixture to the egg-milk mixture and stir until well combined and no clumps remain.

Heat o pan over medium heat. When it’s hot add a knob of coconut oil or butter. Once it’s melted pour in about a third ladle of batter. Bake about 2 minutes on one side or until you see bubbles on top. Then flip and bake on the other side for another 2 minutes or so.

Sprinkle wtih some shredded coconut and serve with some apricot compote or fruits of choice

matcha-pancakes8

Sweet Cornbread with Cardamon-Plum Compote

Hey there :)

I have a quite busy week behind me. Basically because I was baking something every day. I don’t know how, but it just sort of happened.. I wanted to try out this and then there was a birthday.. I also went to see a friend and of course I couldn’t go barehanded. And then I had to bake a bread, this has become a weekly ritual and shall not be forgotten.. So now, we have several goodies at home and this week I don’t have to make anything new to eat as there are still a lot of leftovers. Quite nice :)

cornbreadwithplumcompote4

One of the things I made is this cornbread. I don’t think it is an authentic version of a cornbread. It is a version with personal preferences, such as sugar and Kefir and even some lemonzest to give it a slightly tangy note. So this might not be a standard cornbread, but still very nice and optimzed for summer.

cornbreadwithplumcompote3

Especially with the compote. I find cornbread (be it authentical or not ;)) by itself a bit plain and as the warmer tempetraures have me wanting to eat more fruit, I made a plum compote to go with it. It added a great flavor and also some moisture to it which I really appreciated. Except from the plums, the other big flavor component used in the compote was cardamom which gave a nice complexity to it.

cardamon1 How is your stand on cardamom? I think it is one of my favorite baking ingredients. It gives the dough a slight Nordic taste. My dad on the other hand thinks it tastes like soap.

Well, the point is, if you agree with my father swap the cardamon for something else. Cinnamon always works with plums, but it you are looking for something less wintery, maybe add some lemon zest, mint or maybe even basil. My suggestion though: try the cardamon. Cardamon rocks in my book :)

cornbreadwithplumcompote2


Recipe Sweet Corn Bread

prep time: 15 minutes + 30 minutes baking time +++ makes: one 22cm skillet


Ingredients

  • 125g /  one stick + 2 Tbsp. butter + 1 tablespoon for the pan
  • scant 2/3 Cups brown sugar
  • 2 eggs
  • 1 Cup Kefir
  • 1 Cup cornmeal
  • ½ Cup whole grain spelt flour
  • ½ Cup fine corn flour (can be subbed with other flour like more spelt flour or wheat flour)
  • 1 tsp. baking soda
  • ½ tsp baking powder
  • 1 tsp. vanilla extract
  • ½ lemon, zest
  • pinch of salt


Instructions

Preheat the oven to 180°C and place a cast iron skillet (about 9 inch, 22cm) on the lower third of the oven.

Melt the butter, except for the extra one tablespoon. Add the sugar, salt and vanilla extract and stir to combine. Add the eggs and beat well. I do this by hand but if you prefer using an immersion blender, I guess that works too.

Then add the Kefir and zest of about half a lemon and stir to combine again. Then add the cornmeal, corn flour, spelt flour, baking soda and baking powder. Guess what? Stir again until well combined.

Take out the cast iron skillet. Add one tablespoon of butter and swirl around. Then add the cornbread batter and smoothen out the surface a bit.

Put back in the oven and bake for about 30 minutes or until a toothpick comes out clean.

Meanwhile, make the compote:

Recice Plum Cardamon Compote

prep time: 5 minutes + 20 minutes cooking time +++ yields: about 1 1/2 Cups


Ingredients

  • 6 plumps (if possible choose a variety)
  • ¼ lemon, juice
  • 2 pods cardamom, cracked and seeds ground with mortar and pestle
  • 1-2 Tbsp. brown sugar
  • 1 Tbsp. water


Instructions

Stone the plums and cut into eights (or smaller pieces if you prefer).

Place all ingredients for the compote in a small saucepan. Simmer over medium-low heat for about 20 minutes. I like to reserve one or two plums and add them just 5 minutes before the compote is done to have some bite to it. But that’s up to you.


Serve the cornbread with some plum compote on top and maybe a dollop of yoghurt if you like

cornbreadwithplumcompote1

Sourdough Hokkaido Milk Bread with 2 different fillings

Hey there :)

Do you know the tangzhong (or water-roux) method? It’s mainly used is asian parts of the world to create a fluffy, pillow-y bread. Often called Hokkaido Milk Bread. And it’s awesome! And super easy actually. You just mix together some flour and water and heat it for short period of time. Now, I don’t get the whole chemical process behind this entirely, but making this gel and using it in baked bread will help to keep the moisture in the dough, as the tangzhong part sort of locks the liquid in the dough. Also, it won’t develop as many gluten as normal dough does. Hence the result of baked treats using tangzhong are soft and moist in the most pleasantly way.

For this bread I have combined the tangzhong method with a sourdough base and it works quite well. The sourdough adds a slight and subtle acidy, that deepens the flavor of the bread. Also you don’t need any yeast in order to make the bread rise (if your sourdough is strong) which is something I personally prefer.

sauerteigtangzhong5

For the recipe here I am giving a very basic dough that works with either – sweet or savory fillings. So if you feel like it, you could just divide the dough in half and make one sweet and one savory smaller bread out of it. Which is great, if for example you’re having a gathering and want to provide with sweet and salty treats :)

sauerteigtangzhong3

sauerteigtangzhong13

sauerteigtangzhong12

But you could also easily adapt the dough, add some more sugar or vanilla, cinnamon, tonka bean etc. to it to make the dough itself sweeter. Or some more salt, pepper and herbs for example for a heartier version. You can really adjust the basic recipe in so many ways, it’s great.

Same goes for the filling. I have made this bread with different fillings by now. The classic cinnamon-sugar version is always awesome, but add a grated apple, or two and it will get even better. Or use some Nutella. or peanut butter and banana. The sky is the limit ;)

So, the making of the dough takes a bit of time and maybe time management, but the steps themselves are pretty easy and totally doable even for a not so experienced baker I’d say :)

sauerteigtangzhong15


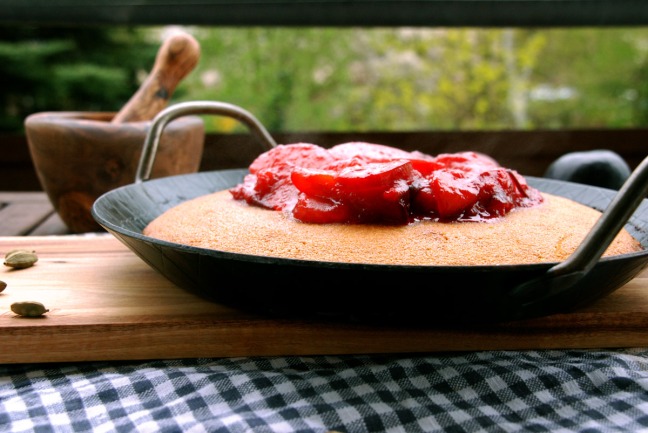
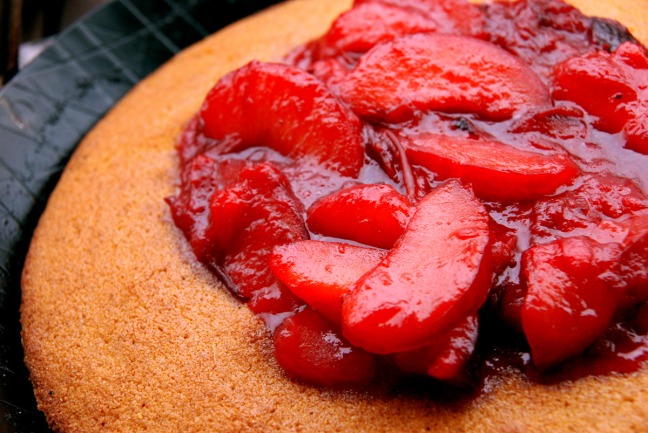
Recipe Hokkaido Milk Bread

prep time: about 25 minutes + proofing time + baking time +++ yields: one large bread or two smaller ones


Ingredients

Hokkaido Milk Sourdough Bread

For the sourdough

  • 50g sourdough starter
  • 75g whole wheat flour
  • 75g water


for the tangzhong

  • 2 Tbsp. white wheat flour
  • 6 Tbsp. water


for the bread

  • all of the sourdough (200g)
  • all of the tangzhong (75g)
  • 100g milk
  • 350g flour (I have used half whole wheat and half white wheat flour)
  • 1 egg
  • 40g butter, very soft
  • 1 Tbsp. brown sugar
  • 1 tsp. salt


notes on the dough: Like this you have a dough that works with sweet and savory options as it is very neutral. If you want to make a dough that tends to be a bit sweeter (don’t make it too sweet when you add a sweet filling or it might be too much), add another 3 Tbsp. of brown sugar and maybe 1 tsp. of vanilla paste or cinnamon.

For a more salty taste, add another teaspoon of salt and maybe some cracked black pepper or even a tablespoon of pesto or garlic butter. But those are just modifications, they are not necessary as the filling will also lend a lot of flavor :)


Fillings

Sweet Version, Cinnamon-Sugar

  • 115g butter, very soft
  • 2 Tbsp. cinnamon
  • 1 tsp. cardamom
  • 1 tsp. vanilla paste
  • 1-2 apples, grated (optional)


Savory Version, Pesto-Cheese

  • 5 – 6Tbsp. pesto
  • 3 cloves garlic, pressed
  • ¼ Cup parmesan
  • 1 ½ Cup grated cheese (like mozzarella or gouda or cheddar, or a mix) to sprinkle on top of the pesto


Instructions Filling

Combine all the ingredients for the filling in a small bowl (except the cheese in the savory filling) and stir until well combined. Taste and adjust spices to your likings.


Instructions Hokkaido Mild Sourdough Bread

Make the sourdough

Mix together the sourdough starter, water and flour and let sit for about 10-16 hours (or overnight).

Make the tangzhong

In a saucepan mix together the flour and the water. Heat the mixture over medium heat, constantly stirring. The mixture should thicken up to fairly fast to a gel-like consistency. Once you can see the bottom of the pan because of lines the dough make when stirring, turn off the heat. If you have a thermometer check the temperature of the dough. The dough should reach 65°C. On the hot stove keep stirring for about 30 seconds and them remove from heat. Place in a clean bowl, set aside and let cool completely.

Make the bread itself ;)

In a big bowl mix the sourdough with the milk, stirring with a wooden spoon. Then add the tangzhong and egg and mix it into the mixture as well until evenly distributed.

Then add the salt, sugar and flour and mix with a wooden spoon until the dough roughly comes together.

Then switch to using your hands ;) Knead the dough for about 4-5 minutes until everything comes together. The dough will be quite sticky, but try not to add flour or the bread will get to dry. I always wet my hands several times during the kneading process so the dough will stick to itself and not to my hands.

Then add the butter in pieces to the dough and knead again for about 4 minutes. At the beginning it will be a bit messy, but it’ll get better over time. Again, the dough is sticky, but try refraining from adding to much flour. Just wet your hands, it really helps. After a while it should form a smooth and pliable dough, still a bit sticky though.

Cover the bowl and refrigerate overnight. You could also use the dough the same day and just leave to rise for about 2-3 hours at room temperature, but leaving it to rise overnight will result in a better flavor and also the gluten has more time to develop, so I highly recommend this version.

After the dough has risen, roll it out into a rectangular shape on a floured working space. Now you are allowed to add some flour on top the dough to make the rolling out easier ;)

Spread and sprinkle the desired filling on top. Then cut the dough into strips and then cut into rectangles that easily fit in your loaf pan. Staple the pieces onto each other and place into a well-greased (or baking sheet lined for the safest option) rectangular loaf or cake pan. Make sure to leave some space at the sides as the dough will rise a bit again.

Leave to rise for about 60 minutes. When readily proofed you can brush it with some more melted butter if you want, but that’s optional

Bake in preheated oven at 175°C for about 35-40 minutes. If you want to sprinkle something on top (like sugar or cheese, do that after 20-25 minutes of baking)
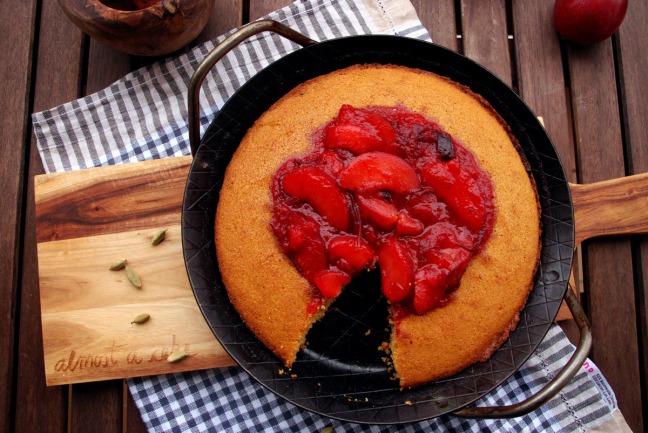
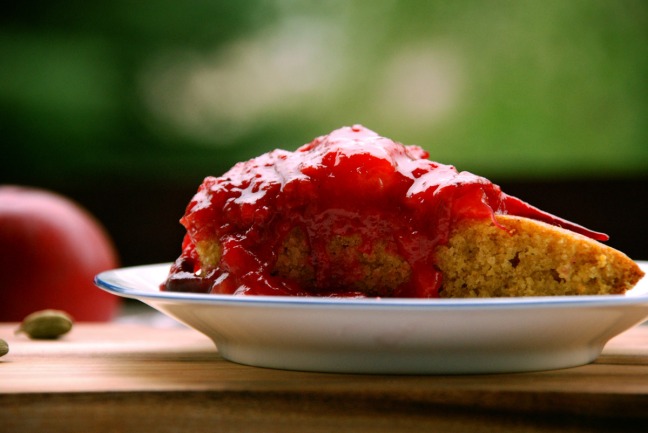
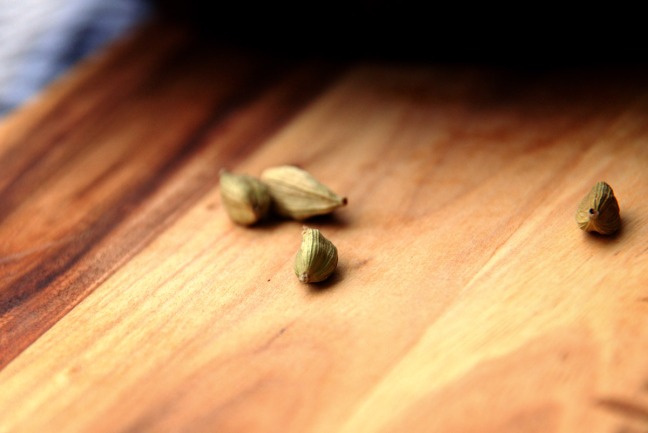
sauerteigtangzhong1

sauerteigtangzhong7

Granola-Seed Bars

Hey there :)

Granola bars is a thing I make every once in a while. It’s easy to make and perfect way to get rid off some leftover ingredients. In my case I’m talking about nut pulp. I make nutmilk almost on a weekly basis so naturally all those ground nuts need a purpose. I hate throwing food away… but I also can’t just put them in my freezer for forever :)

So granola bars is one of the go-to-things I make. I have to be honest, the base I am using does not change a lot, but I play around with spices so they will taste just a bit different every time.

Granola bars are also a perfect way to increase one’s protein intake as you can stuff them with lots of protein rich food or just you can add a scoop of protein powder. Makes it also a nice after workout snack :)

müsliriegel3

müsliriegel2

Recipe

prep time: 10 minutes + baking time +++ yields: about 12 bars, but depends on how big you slice them

Ingredients

Dry

  • 1 ½ Cup / 175g leftover nut pulp from making nut milk, or almond meal
  • 1 generous Cup / 105g rolled oats
  • ½ Cup / 60g chopped walnuts
  • 1/3 Cup / 45g pumpkin seeds, shelled
  • 1/3 Cup / 45g sunflower seeds
  • scant 1/3 Cup / 65g coconut sugar, or brown sugar
  • 2 Tbsp. chia seeds
  • 1 Tbsp. hemp seeds, shelled
  • 1 tsp. lucuma powder (optional)
  • 1 tsp. vanilla powder
  • 1 tsp. tonka bean, freshly ground
  • 2 tsp. cardamom
  • 1 tsp. turmeric.
  • ½ tsp. salt


Wet

  • ½ Cup / 130g nut butter of choice
  • ½ Cup / 125ml rice syrup


top

  • about ½ Cup / 70g chopped dark chocolate


Instructions

In a big bowl mix together all of the dry ingredients.

In another one mix the wet ingredients. When combined, pour, or spoon the wet ingredients over the dry ones.

With a spoon or your hands mix the ingredients until combined. The dough should be a bit sticky but workable without problems.

Line a square pan (like for brownies) or a loaf pan if you have nothing square with baking sheets and put the dough into the pan. Press down with your hands just a bit.

Then top with the chopped chocolate and press down again, this time a little harder.

Bake in the oven at 175°C for about 35-40 Minutes.

Take out, let cool, remove from the form and cut into slices with a sharp knife.

Stored in the fridge they last for at least a week, probably longer.

Lavender Cookies

Hey there :)

I know, Christmas is over but that doesn’t mean you can’t have cookies :) I have to admit though, the main player here, the lavender buds is reminiscent of christmas as I got a spices-calender where they are from. It’s quite fun to play around with some spices I usually don’t use. Lavender buds I have used for the first time and strangely they remind me of thyme.. just a bit.

And although I have paired them with some lavender syrup we have bought a while ago, no one could guess that there were lavender inside the cookies at their first try. I don’t know whether it was because lavender isn’t usually expected or because they aren’t used to the taste or because of some other reason. There was something inside, everybody could taste that, but I had to tell everyone it was Lavender. So if you wanna have a guess-the-secret-ingredient-party anytime, those cookies might be a fun choice :)

lavendelkekse1

lavendelkekse6

lavendelkekse3

Recipe

prep time: about 15 minutes + 15 minutes baking time +++ yields: about 15 cookies

Ingredients

  • 100g Butter or coconut oil, softened
  • 150g white wheat flour
  • 80g sugar + 2 Tbsp. of lavender syrup OR 90g sugar
  • 2 Tbsp. lavender buds
  • 1 tsp. vanilla powder
  • ½ tsp. baking powder
  • pinch of salt
  • some powdered sugar for dusting (optional)


Instructions

In a medium bowl mix the flour, sugar, lavender buds vanilla powder, baking powder and salt and combine.

Then add the butter and lavender syrup and working with your hands, knead everything into a soft dough.

Place about one tablespoon per cookie on a baking sheet lined baking tray. Leave enough space between the cookies as they will spread quite a bit.

Bake at 160°C for about 15 minutes.

lavendelkekse5

Spiced Hot Cocoa with Nutbutter

Hey there :)

Here’s a little follow up recipe for the cocoa nut butter. It’s a pretty nice recipe for those colder days and especially good after a workout as a little ( ..or maybe not so little, it’s quite filling ;)..) treat and protein boost. The protein mainly comes from the hemp milk but of course the nutbutter itself also has some of them. It’s also filled with a lot of minerals and some warming spices.

I used a wide range of spices here in this recipe and I think they combine well together. Adding pepper (cayenne and black) might seem off at first, but it gives the cocoa a nice extra zang so I wouldn’t omit them. It actually fits the overall taste pretty well.

If you don’t know where to buy hempmilk you can make your own pretty easily, I always make it myself. Just combine one part of shelled hemp seeds with 3 parts (I go by volume) of water in a blender and mix it up until smooth. No need to strain through a sieve or anything. Pretty fast and easy stuff. You don’t even need to soak the hempseeds if you don’t have the time as they are already soft. And of course you can vary the taste by adding some spices, salt or sweeteners to fit your preferences :) And for the nutbutter, I am confident that other nutbutters would work as well. I totally could imagine some creamy cashewbutter with it.. or even nutella if that is your thing.. although I have not tested it. I might add a bit more cacao if the used nutbutter doesn’t contain any and maybe adjust the sweetness if going for nutella. All in all this one is pretty open to interpretation. Use whatever you have, if you are fond of one particular spice, go crazy, add more or less maple depending on your sweet tooth. If you are going for a thicker drink, keep the hemp milk added to 2/3 Cups, if you don’t like it as thick, add a bit more :)

hotcocoa2

hotcocoa3

Ingredients

  • 2/3 Cups – ¾ Cup hemp milk (depending on how thick you like it; and of course you can swap with other milk)
  • 2 generous Tbsp. choco-brazilnutbutter
  • 1 Tbsp. coconut oil
  • 2 Tbsp. maple syrup
  • 1 ½ -2 tsp. cacao powder
  • 1 tsp. lucuma powder
  • ½ tsp. vanilla powder
  • ¼ tsp. ground cardamom
  • ¼ tsp. tonka bean, freshly ground
  • ¼ tsp. nutmeg, freshly ground
  • ¼ tsp. cayenne pepper
  • ½ tsp. black pepper, freshly ground


Instructions

In a pan mix together all the ingredients with a whisk until well combined and heat on medium heat. Adjust spices, maple syrup and liquid to your likings.

You can drink it like this if you want, but I prefer to blend it up in a blender first to get it all frothy and foamy :)

Fill in a cup and sprinkle some hempseeds and some spices on top and add just a bit of freshly ground black pepper.


Pumpkin Smoothie

Hey there :)

I don’t know why, but when it comes to smoothies I always feel some restraint posting it. I make and drink a lot of smoothies, but this is the first one I also post on the blog. They sort of don’t really count as real recipes for me, as it always is just throwing stuff in a blender and then mix. And I am aware you can say similar things about a lot of recipes, like sandwiches or overnight oats, but somehow it is more true for smoothies for me. Weird, huh?

Anyway, I still decided to post this one. One has to get out of the comfort zone, right? :P This is also a smoothie that taste- and texturewise is a bit different from the ones I usually make so the ignorant me just applied this to the rest of the world thinking to present something new ;) Well… I guess there are similar smoothies out there, but who cares…

Anyway, back to the smoothie. I find it fits the weather well and thanks to the orange it has some vitamin C to boost the immune system, some ginger to help against inflammation, some pumpkin for vitamin A and some cinnamon helping to stabilize blood sugars. And did you know bananas are said to have anti-cancer benefits?

kürbissmoothie1

Every ingredient has some more pros as well, but let’s just state the obvious :) The orange is pretty dominant in here and if you are not into the combination banana-orange you could also just sub the orange with some milk of your choice. Or if you are looking for a real thick smoothie, just omit it all together. Will make for a nice smoothie bowl :)


kürbissmoothie3


Recipe

Ingredients

  • 1/3 Cup pumpkin puree
  • ½ banana
  • 1 small orange, juice (or 1/2 Cup almond milk if you prefer)
  • small ( about 1cm) piece of ginger (optional)
  • 1 tsp. cinnamon
  • ½ tsp. vanilla powder


Instructions

Hey, it’s a smoothie. You know what to do. Blend it, baby :)
And adjust liquid to taste, fill in cups or glasses and sprinkle some more cinnamon on top.